Swift Initializers Part 2: Classes
Swift Initializers: Understanding Initializers in Classes
Introduction
In the previous article Swift Initializers: Understanding Initializers in Structs, we explored initializers in structs.
Structs are relatively straightforward because they do not support inheritance.
Classes introduce additional complexity because they participate in inheritance hierarchies. Swift must ensure that both a class and all of its superclasses are fully initialized before an object can be used.
The other important and significant difference between structs and classes is that classes do not provide a memberwise initializer. All classes must include an initializer if any stored property does not have a default value.
In this article, you'll learn how class initializers work, the difference between designated and convenience initializers, initializer inheritance, required initializers, failable initializers, and Swift's two-phase initialization process.
Why Class Initializers Are Different
If you create a class with properties that have default values and you do not provide an initializer, you cannot create a new instance of that class and specify different values for the properties at the time of creation.
class ClassUser { var name: String = "Stewart" var isPremium: Bool = false}let user1 = ClassUser()If there were a struct, however, you still get a memberwise initializer by default and have all of the different options for initializers.
struct StructUser { var name: String = "Stewart" var isPremium: Bool = false}let user2 = StructUser()let user3 = StructUser(isPremium: true)let user4 = StructUser(name: "Emily")let user5 = StructUser(name: "Aidan", isPremium: true)Classes with no default property values
All stored properties in the class must be initialized so if there are no default values, these must be addressed in the initializer.
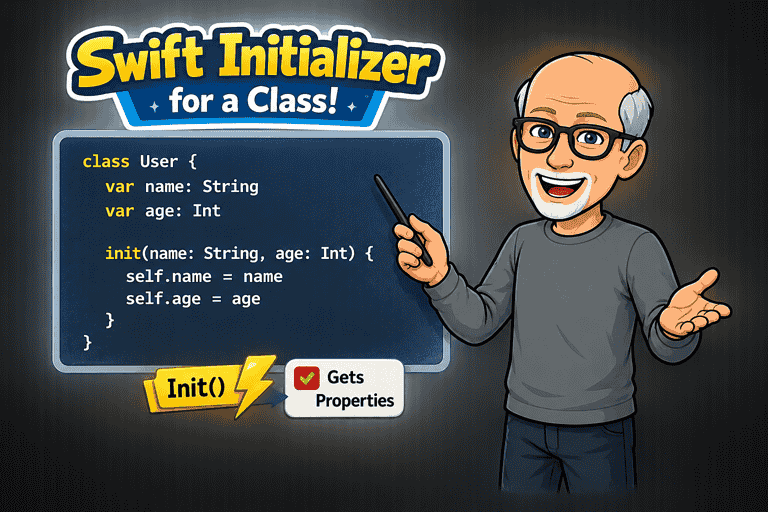
An initializer is a special type of member of a class or struct whose job is to create and prepare a new instance for use.
The init keyword is identifies the initializer and the initializer parameters are the values and types that callers can provide during initialization. So if your properties do not have default values assigned, the initializer must have a parameter that is used in the initializer body assign the provided values to the corresponding object properties.
If the parameter names are the same as the property names, then in the initializer body, self.is used in front of the property name to refer to the property and avoid ambiguity.
class User { let name: String let isPremium: Bool init(name: String, isPremium: Bool) { self.name = name self.isPremium = isPremium }}Constant Properties and Initialization
The rules for constant properties in classes are the same as those for constant properties in structs. They must receive values before initialization completes and they cannot be changed afterwards
class ClassUser { let name: String let isPremium: Bool init(name: String, isPremium: Bool) { self.name = name self.isPremium = isPremium }}let user = ClassUser(name: "Stewart", isPremium: false)user.isPremium = true // ErrorInitializer Parameter Labels
You can add additional external parameter labels to that are different from the property names. The purpose of external initializer parameter labels is to make code more readable and self-documenting at the point where an instance is created.
class ClassUser { var nom: String var estPremiume: Bool init(name nom: String, isPremium estPremiume: Bool) { self.nom = nom self.estPremiume = estPremiume }}let user = ClassUser(name: "Stewart", isPremium: true)Default Parameter Values
You can provide default parameter values for one or more of your properties in the initializer parameters to make an initializer easier to use by providing sensible defaults for parameters that callers don’t always need to specify.
Each default parameter value will add an additional initializer option upon creation.
class User { let name: String let isPremium: Bool init(name: String, isPremium: Bool = false) { self.name = name self.isPremium = isPremium }}let user = User(name: "Stewart") // isPremium is falselet user2 = User(name: "Stewart", isPremium: true)Designated Initializers
A designated initializer is the primary initializer of a class. Its responsibility is to ensure that all of the class’s stored properties receive values and that initialization continues up the inheritance chain by calling a designated initializer in the superclass as you will see. It is responsible for fully initializing the class.
class User { let name: String let isPremium: Bool init(name: String, isPremium: Bool) { self.name = name self.isPremium = isPremium }}Convenience Initializers
A convenience initializer is an initializer that provides an easier or more specialized way to create an instance, while delegating the actual work of initialization to a designated initializer.
If a designated initializer is the master initializer, a convenience initializer is a shortcut.
class Video { let title: String let duration: Int init(title: String, duration: Int) { self.title = title self.duration = duration } convenience init(title: String) { self.init( title: title, duration: 0 ) }}let video = Video(title: "Understanding Initializers") // Duration = 0let video2 = Video(title: "Understanding Initializers", duration: 40)Now you may be wondering how this differs from the example in Default Parameter Values above and this example there is really no difference. Why not just write it like this?
class Video { let title: String let duration: Int init(title: String, duration: Int = 0) { self.title = title self.duration = duration }}let video = Video(title: "Understanding Initializers") // Duration = 0let video2 = Video(title: "Understanding Initializers", duration: 40)However, you can take advantage of convenience initializers to communicate intent. For example, in the convenience initializer for this class, we can change the parameter label to clarify what this initializer is intended for.
class Video { let title: String let duration: Int init(title: String, duration: Int) { self.title = title self.duration = duration } convenience init(draftTitle: String) { self.init( title: draftTitle, duration: 0 ) }}let video = Video(draftTitle: "Understanding Initializers") // Duration = 0let video2 = Video(title: "Understanding Initializers", duration: 40)Designated vs Convenience Initializers
Designated initializers fully initialize the class.
Convenience initializers must call another initializer in the same class using self.init(...).
Class Inheritance
In the article on structs, initialization was relatively straightforward because structs do not support inheritance.
Classes are different.
A class can inherit properties and behavior from another class.
Consider this example:
class Person { let name: String init(name: String) { self.name = name }}Now let’s create a subclass:
class Employee: Person { let employeeID: Int init(name: String, employeeID: Int) { self.employeeID = employeeID super.init(name: name) }}An Employee contains everything that belongs to a Person plus its own additional information.
Person
└─ name
Employee
├─ name
└─ employeeID
When an Employee is created, Swift must ensure that:
employeeIDreceives a value.namereceives a value.- Both the
Employeeportion and thePersonportion are properly initialized.
This is where initialization becomes more complicated than it was for structs.
class Employee: Person { let employeeID: Int init(name: String, employeeID: Int) { self.employeeID = employeeID }}What value should name have?
The superclass has not been initialized.
Swift prevents situations like this by enforcing a set of initialization rules.
Building an Object from the Bottom Up
The subclass initializes its own stored properties first:
self.employeeID = employeeIDThen it asks the superclass to initialize its properties
super.init(name: name)Only when every class in the hierarchy has finished initialization is the object considered ready to use.
Without these rules, Swift could allow partially initialized objects to exist
let employee = Employee(...)might contain a valid employeeID but an uninitialized name.
Swift’s initialization system prevents that from ever happening.
This focus on safety is the reason Swift introduces designated initializers, convenience initializers, and the delegation rules that we’ll examine next.
Understanding Swift's Three Delegation Rules
When Swift introduced designated and convenience initializers, it also introduced three rules that govern how they interact.
Rule 1
A Designated Initializer Must Call a Designated Initializer from Its Immediate Superclass
class Person { let name: String init(name: String) { self.name = name }}class Employee: Person { let employeeID: Int init(name: String, employeeID: Int) { self.employeeID = employeeID super.init(name: name) // This calls the Person designated initializer }}- Subclass properties must be initialized before calling
super.init().
- Designated initializers move up the inheritance chain.
Rule 2
A Convenience Initializer Must Call Another Initializer in the Same Class
class User { let name: String let isPremium: Bool init(name: String, isPremium: Bool) { self.name = name self.isPremium = isPremium } convenience init(name: String) { self.init(name: name, isPremium: false) // this calls the User initializer }}- Convenience initializers move across the same class.
Rule 3
A Convenience Initializer Must Ultimately End Up Calling a Designated Initializer
Every initialization path must eventually reach a designated initializer.
Remember
Convenience → AcrossDesignated → UpOverriding Initializers
A subclass can override an initializer of the superclass.
Overriding an initializer allows a subclass to customize how an inherited initialization process works.
In this example, the Employee class overrides the initializer inherited from Person.
Notice the use of the override keyword. This tells Swift that we’re replacing the implementation provided by the superclass.
The override initializer in the Employee class first initializes the employeeID, giving every user a unique ID during initialization and only then can the initializer delegate to the superclass
class Person { let name: String init(name: String) { self.name = name }}class Employee: Person { let employeeID: Int override init(name: String) { self.employeeID = Int.random(in: 1000...9999) super.init(name: name) }}Swift follows these steps.
Employee.init(name:)
│
▼
employeeID initialized
│
▼
Person.init(name:)
│
▼
name initialized
│
▼
Object ready to use
Required Initializers
Sometimes a superclass needs to ensure that every subclass provides a particular initializer.
The purpose of required is not to force a subclass to call super.init(name:).
The purpose of required is to force a subclass to provide an initializer with the same signature.
Consider this class
class Person { let name: String required init(name: String) { self.name = name }}Now consider this subclass
class Employee: Person { let employeeID: Int init(name: String,employeeID: Int) { self.employeeID = employeeID super.init(name: name) }}This fails because the required superclass init must be provided by the Employee subclass.
class Employee: Person { let employeeID: Int required init(name: String) { self.employeeID = 0 super.init(name: name) } init(name: String,employeeID: Int) { self.employeeID = employeeID super.init(name: name) }}Failable and Throwing Initializers
Failable and throwing initializers work exactly the same in classes as they do in structs. The primary difference is that subclasses must also account for failures or errors that may occur when calling superclass initializers. If a superclass initializer can fail or throw, subclasses must handle that behavior as part of their own initialization process.
class Person { let name: String init?(name: String) { guard !name.isEmpty else { return nil } self.name = name }}class Employee: Person { let employeeID: Int init?( name: String, employeeID: Int ) { self.employeeID = employeeID super.init(name: name) }}let employee = Employee(name: "",employeeID: 1001) // nilIn this example, super.init(name: name) fails because name is empty. Since the superclass initializer is failable, the subclass initializer must also be failable
Final Example
Here is an example of a Course class with a VideoCourse subclass
The Course has a throwing initializer as well as a convenience initializer.
Similarly, VideoCourse has a throwing initializer and a convenience initializer o its own.
enum CourseError: Error { case emptyTitle case invalidDuration}class Course { let title: String let lessonCount: Int let isPublished: Bool init( title: String, lessonCount: Int, isPublished: Bool ) throws { guard !title.isEmpty else { throw CourseError.emptyTitle } self.title = title self.lessonCount = lessonCount self.isPublished = isPublished } convenience init(title: String) throws { try self.init( title: title, lessonCount: 1, isPublished: false ) }}class VideoCourse: Course { let durationInMinutes: Int init( title: String, lessonCount: Int, isPublished: Bool, durationInMinutes: Int ) throws { guard durationInMinutes > 0 else { throw CourseError.invalidDuration } self.durationInMinutes = durationInMinutes try super.init( title: title, lessonCount: lessonCount, isPublished: isPublished ) } convenience init(title: String) throws { try self.init( title: title, lessonCount: 1, isPublished: false, durationInMinutes: 60 ) }}// Uses the videoCourse initializerlet swiftUICourse = try VideoCourse( title: "Mastering SwiftUI", lessonCount: 42, isPublished: true, durationInMinutes: 540)// Uses the VideoCourse convenience initializerlet draftCourse = try VideoCourse( title: "Introduction to Swift")// Fails the validation in VideoCourse where the duration must be > 0let course = try VideoCourse( title: "SwiftUI", lessonCount: 20, isPublished: true, durationInMinutes: 0)// Fails the validation where a Course title cannot be emptylet course2 = try VideoCourse( title: "", lessonCount: 20, isPublished: true, durationInMinutes: 10)Conclusion
Class initialization builds on the concepts you learned with structs but adds inheritance, designated initializers, convenience initializers, required initializers, and two-phase initialization.
Remember:
Convenience goes across. Designated goes up.